Tuesday, February 25, 2014

Ham, Swiss, and Leek Quiche | Fat and Happy


I'm not sure what to say about quiche. I don't think it's particularly healthy, but it's definitely not a junk food. People seem to have a lot of opinions about quiche being 'girly,' but I don't think that's really true either. I did love the story that everyone's favorite Pioneer Woman, Ree Drummond told--her husband refused to eat quiche (due to a seemingly high volume of gender norms in their family), so she tricked him into it by calling it bacon and egg pie. Trickery! Silly men. Food is food.

All that aside, the best way to feel about quiche is YUM I LOVE THAT! When made right, it will just melt in your mouth. Plus you can put just about anything you want in and call it your own personal masterpiece. That's what I did here. This recipe was inspired by having a leek, and not knowing what the hell to do with it.

This one's for you, pal.

Ham, Swiss, and Leek Quiche

Ingredients:
1 homemade pie crust feel free to do store-bought. This isn't a blog about judging people.
1 cup ham, diced finely
1 cup swiss cheese, grated or diced
1 large leek, sliced into medallions up to the light green portion I honestly can't think of a less nerdy word than medallions.
6 eggs
1 cup whole milk
1/4 cup heavy cream
1/2 tsp salt
1/4 tsp pepper
1/4 tsp paprika

Makes 6-8 servings, depending on the bellies. 


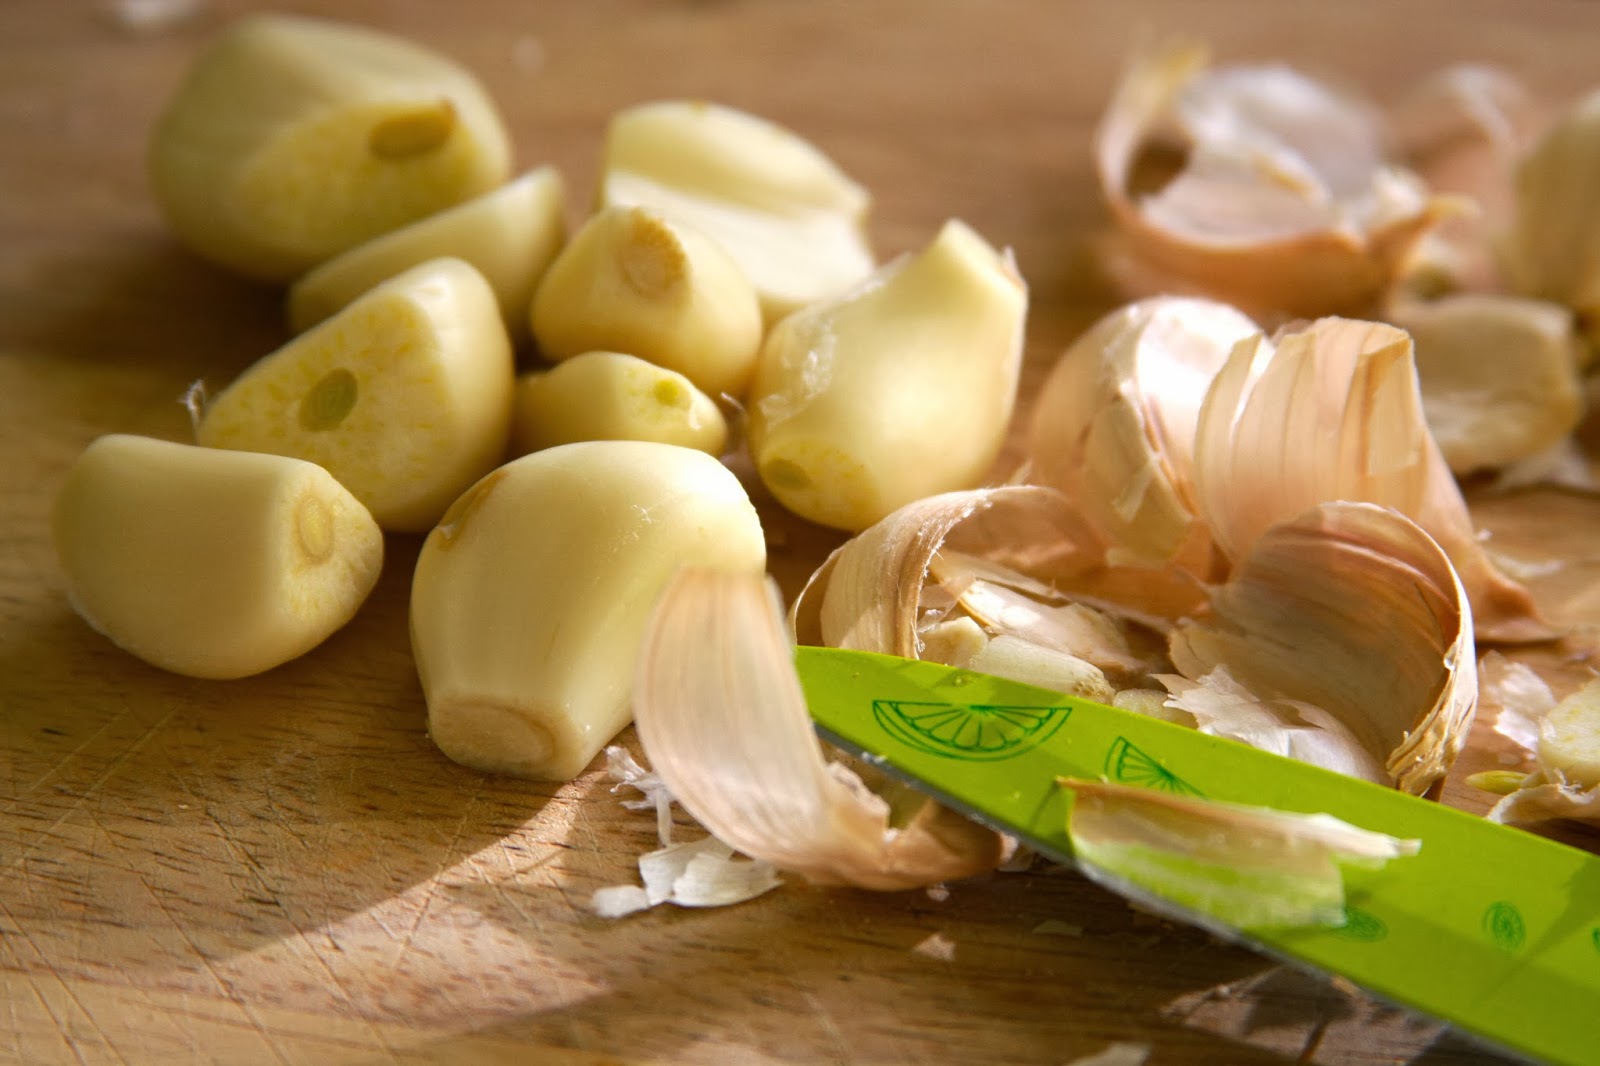
Once you've done your slicing and dicing, heat up a nice and wide frying pan with a little olive oil on medium heat. Gently place your leek slices in the pan, doing your best throughout this process to keep each one in tact. Obviously that's not going to be a 100% success, and it only really matters in the first place if you want your quiche to look like mine. If you'd rather mix 'em all up, have at it! If you're going my way, use a nice wide spatula to flip the leeks just once, so that they're browned on both sides and a little soft.


Now, while your beautiful (or not) leeks are cooling off a bit, line a deep dish pie pan with your crust. Unlike pies, for quiche I prefer to have as little crust as possible above the actual rim of the pan, and push the extra down. Layer the ham in the bottom of the crust, then the cheese on top of that.

In a nice big bowl, mix the eggs, milk, cream, and spices together with a whisk. Make sure there's no huge chunks of those weird egg white globs! Pour your liquid mixture over the ham and cheese. Then, as gingerly as you can, arrange the leeks on the surface of the quiche. The cheese and ham layers do a great job of holding them up at the right height, you just have to make them pretty (or not)!


I realized at the last second that it might be helpful to see what it looks like when fully assembled, so here's a quick snap of the before quiche...

In an oven preheated to 375 degrees, bake the quiche for 25-35 minutes. It took me a lot of googling to figure out the secret to really knowing if it's done or not (thanks for nothin' Martha Stewart!), and here it is: First, it should have become a lovely golden brown and have a nice crispy-looking crust. That part's easy. Then, if you think it looks good, give it a shake. When you wiggle it a little, just the center should shake along with you. And then if you're still nervous, test it with a knife! Poke it right in the center, and if she comes up clean it's time. Finally!!


I promise, it's just as delicious as it is beautiful! It's fun to get to invent your own quiche, but this is my go-to. Do you have a favorite flavor combo for your quiche? Secrets to make it a little closer to a healthy meal? Dish it in the comments!

Quiche mode!
-gu


Monday, February 24, 2014

Meatball Minestrone Soup | Fat and Happy

Get out your best cauldrons, Lush Scouts, it's stirrin' time!

If you've found yourself with a hankering for something warm in this winter of polar vortexes (I can hear you all saying "amen sista!!" from here), this is a nice snow day treat that will feed you for days. Better yet--it just takes an hour or so from start to finish! Just about the best thing that you can do for yourself on a week when you know you'll be cold, busy, and lazy. Feel free to do some cost-benefit analysis if you don't believe me, but you're just going to make yourself hungry so you should probably get chopping.

Here's the recipe I used from the food network as my starting point. It was a great base for the measurements and the directions, but I think my distaste for following rules keeps me from ever doing a recipe perfectly. Ooooh you rebel Gu. I know. I know! Lets get on with this soup, Lushies, I'm getting cold!


Meatball Minestrone Soup

Ingredients:
2 Tbs Olive Oil
1 lb ground mild italian sausage
1/2 yellow onion, diced
1 medium carrot, diced
2-3 stalks celery, sliced and then chopped a little smaller
1 cup kale, chopped finely
1 tsp dried basil
1/4 tsp garlic powder
Salt & pepper
1 can diced tomatoes (28 oz)
1 can crushed tomatoes (14 oz)
6 cups chicken broth
1 can red kidney beans, strained (15 oz)
1/2 cup (dry) Stelline pasta -- that's right, get your stars on!

Makes about 10 servings


Phew! I know that feels like a long shopping list, but it separates pretty easily into one trip to the produce section, and one to the canned veggies. Then get thee to the kitchen!

I started with my lazybones meatballs. Without adding a single thing to the sausage, roll it up into 24 meatballs, each a little less than an inch in diameter. There, you finished your meatball prep. Is that lazybones or what?! Anyway, heat up your olive oil in the pot you'll be using to get ur get ur soup on, and toss in those meatballs. Let them fry, stirring every four or five minutes, until they're cooked through. Using a slotted spoon and leaving as much meatball flavor behind as possible, scoop them out onto a paper towel-lined plate and save for later.


Now toss your veggies in there! First cook the onions for about five minutes, then add the celery and carrots for about five more, then toss in the spices and the kale and give it a stir for another few.

Once the veggies are a bit soft and the onions are nice and translucent, add the chicken broth and the diced and crushed tomatoes. I would recommend briefly taking the pot off of the burner as you're doing so, otherwise there will be lots of scary sizzling and whatnot before things get back to normal. Return the full pot to the burner and bring your soup to a boil.


Reduce to medium heat and let simmer for 10 minutes. Add the beans, stir long enough to sing the 'magical fruit' song to yourself a couple times, and then add the stars. Despite your every instincts, only give the soup about 5 minutes once the pasta is in--those puppies will keep cooking and take over! I don't think it matters too much when you add the meatballs during these last few steps. I think I did so when at the same time as the stars!


And there you have it! As long as you have an affinity for serenely stirring a pot of soup, this recipe is a great one to have in your back pocket. This was my first time making it--my first time making soup at all come to think of it--and I am in love. 

We're gonna have a tv party tonight, alright!
-gu


Friday, February 21, 2014

Friday's Awesome Five

In just a short few days I'll be beach-bummin on my first ever jaunt to Hawaii, so pardon me if this five is a bit sun-soaked. PARDON ME, Lush Scouts!!

1. Courtney Barnett is a girl who surely knows a thing or two about sunshine--she's a new singer-songwriter from down undah! A recent discovery for me, this aussie's new single 'Avant Gardener' is guaranteed to get you chilling on your front lawn. She reminds me of Ty Segall or Kurt Vile in a way, with her psychedelic almost country sound.


1. The neon-coral Scallop Crop Vest (is that British for tank top?) is going to look so so good with my favorite pair of high-waist skinnies! It's leaving me yearning for that first day of spring where you can whip off your jacket and dance in the streets--but for now this bright and sunny top will have to do. From Topshop


3. I found this tasty sounding Candied Grapefruit Cocktail on pinterest this week, and it's kinda hard to tell if it's a cocktail or a cooking project... For people like us, that's a good thing! From Tablespoon


4. Every time that I forget and re-remember that indoor citrus trees are possible, my day is brightened! That happened today, and I spent a good amount of time learning more about how easy it is to keep a lemon, lime, orange, grapefruit, or whatever tree thriving in your favorite sunny window. I have only dim windows (apartment livin'... sigh), so I'll keep this on my list for my next move!


5. Another Topshop item I want need! Summer is the best time for big purses, so that you can have everything from your current book, a bathing suit, a jar of wine, a frisbee, to an emergency cardigan (should night unexpectedly fall). From Topshop


We'll get there fast and then we'll take it slow,
-gu

Friday, February 14, 2014

Friday's Awesome Five

Donut you know I'm in love with donuts? Today's five is a testament to a love that will last through the ages: Gu + donuts (hey coffee, you're alright too).

1. Everyone knows that the best way to have a beach bod is to put your body on a beach. Next time my beach bod hits the waves, it'll be atop this larger-than-life donut. From Urban Outfitters


2. It may be too late to give this to your lover for v-day, but there's no wrong time to tell your sweety you love them. Say it with donuts! From MudsplashStudios on Etsy


3. You'll never love a donut so much as when it's handcrafted by your favorite Lush Scout--YOU! I made a big ol' batch of love-infused donuts for v-day (I totally made the ones in this picture! I'm amazing!), and I'll share the recipe with you this week. Yay!!


4. In the mood for an ah-dorable little project? Make balloons to remind you of your favorite treat, then throw a party and invite all your fellow donut lovers! BYOSprinkles? From Studio DIY

DIY Donut Balloons

5. And last, if you find yourself wandering around Pike Place Market with your sweetheart, as I often do, treat them to some tiny sweets! Daily Dozen Donut Co. is right in the market, and anyone who's a sucker for mini stuff (everyone) would love a bite size pastry while they're seeing the Seattle sights. Here's their Yelp page


Thought I was a donut, tried to glaze me,
gu


Thursday, February 13, 2014

Heart-y Hand Pies | Fat and Happy

Salutations Lush Scouts! On this, Valentine's day eve, I have a super easy recipe for a treat fit for your man, your friends, or your coworkers. It would also be the perfect companion for a restful evening of Netflix binging. Like all of my favorite Lush Scout recipes, it's easy, breezy, and has minimal ingredients. It's adapted from another Pin (GASP), that links to this original recipe. Without further ado:


supplies needed for heart pies

You need:
Pie Crust
Ricotta Cheese
Cherry Pie Filling
Sprinkles (optional, but also they're sprinkles so TOTALLY NOT OPTIONAL)
Heart Shaped Cookie Cutter

cutting the pie dough

Unroll the dough.

heart shaped cut-outs

Cut heart shapes. An even number is preferable and I found that the store-bought crust reliably provided 6 on first cut and two more after re-flattening with a rolling pin. 5 pies total.

adding ricotta to the pies

Arrange the hearts in pairs and smear with a heaping spoonful of ricotta. Feel free to add more if you really like the idea of ricotta and cherry (it's delish though, so you should definitely be open to liking it). Be sure to leave a wide enough berth around the edge to seal the pies.

adding cherry-filling to the pies

Add the cherry pie filling. I found that creating a mountain of ricotta with a valley in the middle for the cherries (a la mashed potatoes and gravy volcano) worked best.

putting heart pies together

Dip your finger in water (or butter) and run around the outside edge, then add the top piece and seal with a fork. It's okay if a little juice comes out, you can wipe it off before baking.

adding sprinkles

Rub a little water (or butter) on top so the sprinkles will stick. 

baking the heart hand pies

I baked the pies on 380º F for about 18 minutes. But that's just my oven and yours might be totally different. The best way is to keep an eye on them, and when the crust is cooked and turning golden brown around the outsides, take those babies out! When they're done, remove from the tray and allow to cool.

finished heart-shaped pies

And that's all there is to it! I managed to whip out about 15 hand pies within an hour. This tutorial also applies to pretty much any other simple cookie-cutter shape, and alternative fillings, and could be used for so much more than this holiday. They would make a nice birthday treat, mother's day delicacy, or accompaniment to finger sandwiches at a tea party. I highly recommend them. I gave some to Gu (so I suppose she could speak as to their quality without bias), and will take some to my man and my coworkers tomorrow! I hope you all have a very sweet Valentine's day, regardless of your plans, and definitely let me know how your pies turn out!

You make loving fun,
Cait

Sunday, February 9, 2014

Sunday Night Zen

Some very very sound advice the Gu dug up on the ol' interwebs...


Bis Morgen Scouts!
Cait

Eggplant Pizzas (Pinterest Win!) | Fat and Happy

Greetings Lush Scouts! I don't know if you've heard, but I'm quite a pinner, and I actually find the majority of new recipes in my life on Pinterest. I have yet to have what they call a 'Pinterest Fail'. Maybe I'm just not motivated enough to try things that look difficult.  But the recipe below came directly from this pin (which lead me here)and into my kitchen. It's simple, delish, and not-too-bad-for-you: basically English muffin pizzas for grown-ups!

The ingredients list is crazy simple:
An Eggplant (not a shrimpy one, not a giant, just average)
Tomato Sauce (lucky for you, I posted a simple recipe last week!)
Olive Oil (it's a given right?)
Italian Seasoning (or whatever you have available)
Pizza Toppings (the hardest part, I know, but I went with fresh mozz, olives, and salami)

sliced eggplant

First, you want to slice the eggplant. The recipe I was following said to go with 3/4 inch slices. I, however, didn't have a ruler, so I just followed my heart. Here comes the weird thing with eggplant: you have to draw some of the water out before cooking with it. So you then salt both sides of the eggplant and put them on a paper towel. Leave them for 30 minutes to an hour, and then wipe the excess moisture and salt off with the paper towel.

roasting eggplant

Put the slices on a cookie sheet, brush with olive oil, sprinkle with slices and throw in the oven to roast. I gave them about 30 minutes at 400ºF. I was really hungry at this point and couldn't do more than 30 minutes. 

eggplant with tomato sauce

After you remove your roasted eggplant from the oven, set your oven to broil. Then slather those babies in tomato sauce

eggplant pizzas before cooking

Add your favorite toppings. I chose to go simple since it is such a small amount of topping-space.

eggplant pizzas before cooking

Just mozz and olives for me (I thew salami on some, but it was weird tasting, so I ended up taking it off.) Let it broil for 8 or so minutes. Keep an eye on it because every broiler is different. When it's melty and the cheese is starting to get some of those beautiful golden brown bubbles, you'll know it's time to eat.

how to make eggplant pizzas

Chow down! I had a couple right out of the oven and MAN were they good. I also put some in a tupperware, layered up and reheated at work. STILL DELICIOUS. 

And there you have it, lovely Lushies, a handheld pizza reminiscent of the English muffin pizzas of your youth. I recommend experimenting with different toppings. I'm thinking I'll go with hawaiian for my next go-round. Or maybe I'll throw some fresh basil on. The possibilities are endless!

I take my lunch up on the roof,
Cait

Monday, February 3, 2014

Simple Tomato Sauce | Fat and Happy

Gutentag meine schöne Lush Scouts. I have a recipe for you today that is both simple and extremely versatile: Tomato Sauce (street name: Marinara). It can be paired with noodles, slathered on pizza, mixed with quinoa, used as a dipping sauce (why helloooo mozz sticks) and so so much more. It has very few ingredients and takes very little work (no peeling involved, Scout's honor), making it a perfect Lush Scout recipe. This also means that you know exactly what is in your sauce and there are no crazy dyes, chemicals you can't pronounce, or preservatives; I assume this means healthy! Besides, this bag of tomatoes cost only 1 dollar more than a can of sauce, so it doesn't get any better! 

You can throw it in the freezer or eat it up right away. If you know things about canning you could do that too, but I have a healthy fear of Botulism, so I won't attempt that without the proper know-how. 


Ingredients for Tomato Sauce

To get crackin' on this delicious sauce, you'll need the following:
Tomatoes (whatever kind you like, and however much you think you'll use)
Garlic (I prefer fresh, but powder would work too)
Italian Seasoning (or a mix of your fave spices Italiano, or some fresh oregano and basil)
Salt
Pepper
Paprika (optional, but I put it in everything)
Carrots (the secret ingredient!)
Olive Oil (I forgot this in the above photo. My bad)

Peeling Garlic for Sauce

Start by peeling your garlic. I probably used about ten cloves (half a head) but this can be adjusted to taste. There's no need to mince the garlic, go ahead and roast them whole.

sliced and cored tomatoes

Next you will need to half and core your tomatoes. I just slice in half and cut a 'v' shape in the middle to remove the core.

tomatoes ready for roasting

Put the tomatoes inside-up on a pan, strategically place the garlic cloves, and drizzle with olive oil. Sprinkle liberally with pepper, paprika, and Italian seasoning. Also add a dash of salt to taste.

tomatoes ready for roasting

Then, into the oven at 400ºF for one hour. Your tomatoes will look all squishy and may even start to blister, but never fear, that's totally normal.

secret ingredient: carrots

While the tomatoes are roasting away, cut up those carrots and sauté in Olive oil. 

sauteed carrots for tomato sauce

The carrots add some extra nutrients to the sauce, as well as some needed sugar. Additionally, they help it keep its bright orange/red colour.

ingredients ready to blend

After your hour is up,  scrape the tomatoes, juice, garlic, and carrots into a pot.

blending tomatoes with a hand blender

Here is the messy part: blending the ingredients. I used a hand blender, which as you can tell from the spatter in the above photo, may have gotten a little out of hand. You could just as easily use a food processor or regular blender though.

simple tomato sauce

And then, VOILA!, you have sauce. If it isn't thick enough for your tastes, just put that pot on a burner and simmer it down. This is also the fun part where you get to taste and season. Add as much spices as you feel like. Follow your heart!

easy tomato sauce recipe

I then put mine in, no joke, an old spaghetti sauce jar. I used half of the sauce on dinner, and put the rest into the freezer. When I decide I need it, I'll just put it in the fridge before leaving for work in the morning and let it thaw right out.

That's all there is to it. You can make a lot or just one jar, like yours truly. Add more carrots if you prefer sweet sauce, or maybe experiment with different types of tomatoes. In the summer I'll definitely be playing around with some fresh basil and I'm also thinking of giving some lemon verbena a go. Let me know if you find any incredible combos!

then ride it with my surfboard,
Cait