Showing posts with label recipe. Show all posts

Thursday, June 26, 2014

Sweet Pepper and Kielbasa Tortellini with Lemon White Wine Sauce | Fat and Happy

It's almost Friday Lush Scouts! And that means you probably need a delicious and yet easy thing to cook to impress your bff/boyf/mom this weekend. I've whipped up a similar recipe to the below a couple of times using different vegetables, but this was my favorite combo thus far. I apologize that there aren't too many process pictures, but mostly I just want to show off these photos because I'm very pleased with how they turned out.

You're going to need the following (but feel free to make substitutions because a Lush Scout always follows her heart and sometimes has empty cupboards):

kielbasa (I use Turkey kielbasa)
tortellini
white wine
lemon or lemon juice
mozzerella or parmesan cheese
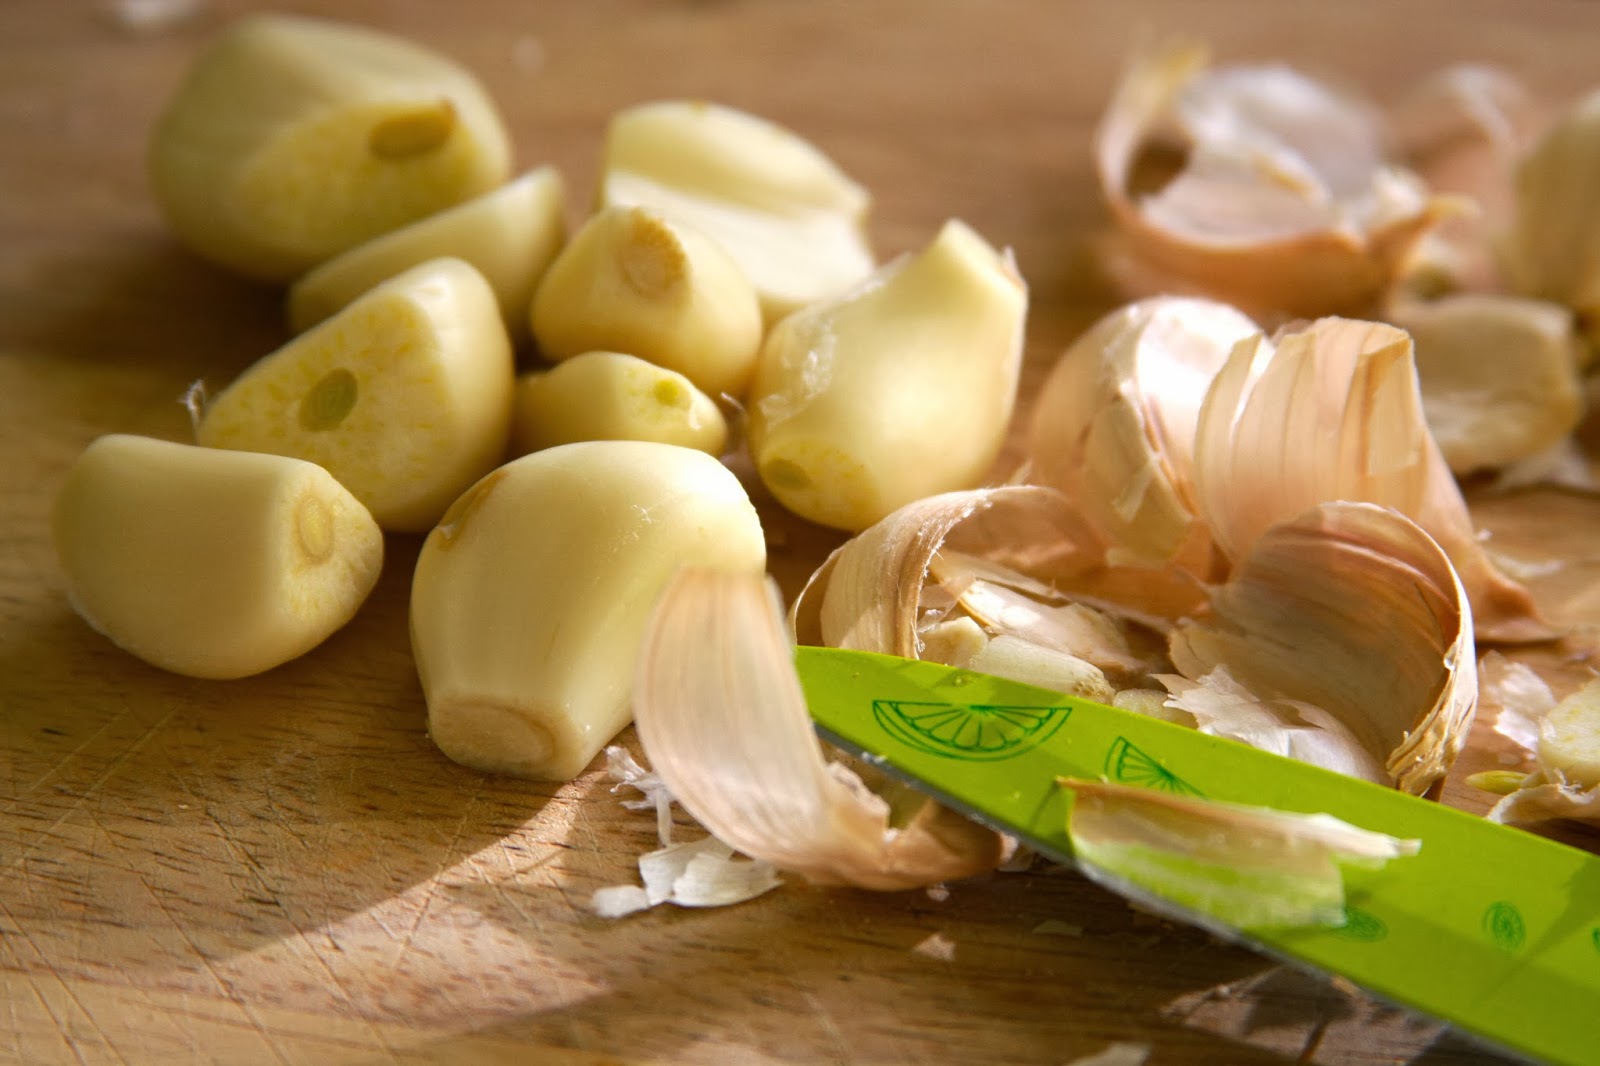
garlic scrapes
fresh basil
sweet peppers
green beans
spinach
edamame
butter

ingredients for the recipe

First things first, start the water boiling for the Torts. Cook them according to the packaging while you perform the more interesting portion of this recipe. Slice the peppers latitude wise so you get nice rings of pretty peppers. I also cut the green beans into smaller pieces. The edamame should be shelled already so no worries there. I roll and cut the spinach and basil into thin strips. I also cut the garlic scrapes. 

garlic scrapes and other veggies

A side note on garlic scrapes: I've never used them before, let alone heard of them before this spring. It's the part of the garlic that grows above ground and it has a delightful, almost sweet garlicky flavor. When preparing my scrapes, I went with the theory of 'use all the soft parts'. I chopped off the harder stems and used everything that was left. This seemed to be the correct strategy.

how to cut garlic scrapes

Melt the butter on the stove. Add the basil and garlic scrapes once the butter is hot enough to sizzle. Once your kitchen fills with a toothsome aroma (but before anything starts burning), add the peppers, edamame and green beans. As they begin to cook, slice the kielbasa and add it too. Throughout the cooking portion, I gave a squeeze of lemon juice and a splash of white wine every couple of minutes. These cook out pretty quickly, so you shouldn't have to worry about the sauce being too soupy. At the very end, while you are removing the tortellinis from the boiling water, add the spinach. Add the tortellinis to the pan with the veggies, mix, and add a little more wine. Shake some cheese into your creation and behold: a fabulous dish that will definitely impress (also just saying you made 'white wine sauce' is going to sound fancy!).

delicious finished meal

Do you have any favorite spring vegetables you think would taste good in this recipe? Let me know how it goes Scouts! 

And every single bone in my brain is electric,
Cait

Thursday, June 19, 2014

Strawberry Rhubarb Oat Walnut Crumble | Fat and Happy

Happy Birthday to me Lushies!

That's right, you heard me, it's my birthday today! And part of my birthday this year was my parents coming to visit last weekend and bringing my most aderbs nibling, Harlee. We went business-action-lady clothes shopping, hit the American Girl Doll store, and visited the aquarium. I absolutely loved having them here and wish so much that they were closer to me. They also brought this amazing recipe, most of the ingredients for it, and a big bundle of rhubarb from my mom's garden!

So the first trick to this recipe is to have a great mom! 

In any case, I'm telling you, this recipe is amazingly delicious and so little work compared to the payout.


There are two parts to the recipe: the crumble and the filling. The crumble contains the following:

3/4 cup flour
1/2 cup rolled oats
1/2 cup brown sugar
1/2 cup toasted & chopped walnuts
1/2 tsp. salt
1/4 cup melted butter


Preheat the oven to 350ºF. You make the crumble first. You mix all of the dry ingredients (flour, oats, sugar, salt, and nuts) and then pour the melted butter over top. Mix those bad boys up and set it in the freezer while you work on the filling.


The filling is just as easy:

1 cup sugar
2 Tbsp tapioca
6 cups rhubarb (cut into one-inch pieces)
6 cups strawberries (sliced)
1 Tbsp vanilla


In all honesty, I don't think I really used 6 cups of rhubarb or strawberries. I used 15 stalks of rhubarb give or take a few. I used just under 1 pint of strawberries. No precise measurements here.


You mix the sugar and tapioca. Then add the fruit and vanilla. Toss those mama jammas gently. Seriously. How fricken good do these look?


Pour the filling into a dish. Add the crumble on top. Pop the whole shebang in the oven for approximately 45 minutes. You'll know when it's done because the crumble will look all melty and golden.


Mom advises that half the recipe can be made, which would be a good choice for a lone person, since a full size crumble could be easily consumed just as quickly as a half-size, it's so good. I chose to make the full thing and split it into a crumble for myself and a crumble to take to the office. 


I highly encourage you to try it. Heck! You could even go crazy with it; my mom made a version last summer with raspberries in addition to the strawberries and it was incredible. One comment from my coworker was 'SO GOOD IN MY BELLY.' Another had second helpings. Seriously. Bitches don't joke around when it comes to crumble. I clearly don't!


The birthday morals of this story are that moms are great and crumble is serious business. Now get cracking on your own crumble and let me know how it goes!

I do it for the love,
Cait

Sunday, June 8, 2014

Salmon BLT with Sriracha Dill Mayo | Fat and Happy

Hello Lush Scouts,

Long time no blog! Good news! I'm finally recovered (mostly)! I've been out celebrating by doing crazy things like walking around normally, going to work, taking less pain killers, and sitting for longer than 10 minutes at a time. It's a real miracle! 

In honor of my return, I whipped up some delicious sammiches inspired by this pin. The basics of this sandwich is a BLT + Salmon. I marinated my salmon in some sesame oil, mae ploy sauce, pepper, dill, and mustard seeds (and possible other things I'm forgetting because it's really just one of those follow-your-heart marinades). I also subbed Spinach for lettuce because I like it more.

fresh salmon, bacon, spinach and tomatoes

While the salmon was grilling away on the old George Foreman (love that fricken thing), and the bacon was sizzling away in a pan, I whipped up the real star of this show: Sriracha Dill Mayo

Seriously though, this stuff is soooo good. It belongs on more than just this particular sandwich. It belongs paired with turkey, mixed into tuna salad, and just about anywhere else you might need mayo (possibly on a hot dog). It brings some heat, while the dill and mayo combine for creamy coolness. I will probably begin stocking this stuff year round, force people who come over to eat it, and also maybe give it as a really weird gift.

sriracha dill mayo ingredients

I took about half a wee mason jar of mayo and added several sprigs worth of fresh dill as well as a healthy amount of Sriracha (3, possibly 4, TBSP). I then mixed with a fork. Easy peasy.

sriracha dill mayo FOREVER

Combine all ingredients on your bread product of choice. I went with ciabatta and also used a little bit of margarine on the opposite side from the magic mayo. As a whole, the sammy is good; really, melt in your mouth good. I could probably go without the tomatoes next time, just because I seem to be on an anti-tomato kick right now, but other than that, I wouldn't change a thing.

nom nom salmon BLT

Pair it up with one of these bad boys, which I've discussed previously, Radler. I'm starting to see this magic stuff stocked more frequently. Schöfferhofer also makes one that I see around, but being as I am pretty favorable towards Austria, I pick Stiegl every time. It overjoys me to see it and buy it, but especially to drink it ice cold out of the fridge.

LOVE DAT RADLER

Let me know how the sammich, or more importantly, THE MAYO turn out for you. 

Down in the jungle living in a tent,
Cait

Thursday, February 13, 2014

Heart-y Hand Pies | Fat and Happy

Salutations Lush Scouts! On this, Valentine's day eve, I have a super easy recipe for a treat fit for your man, your friends, or your coworkers. It would also be the perfect companion for a restful evening of Netflix binging. Like all of my favorite Lush Scout recipes, it's easy, breezy, and has minimal ingredients. It's adapted from another Pin (GASP), that links to this original recipe. Without further ado:


supplies needed for heart pies

You need:
Pie Crust
Ricotta Cheese
Cherry Pie Filling
Sprinkles (optional, but also they're sprinkles so TOTALLY NOT OPTIONAL)
Heart Shaped Cookie Cutter

cutting the pie dough

Unroll the dough.

heart shaped cut-outs

Cut heart shapes. An even number is preferable and I found that the store-bought crust reliably provided 6 on first cut and two more after re-flattening with a rolling pin. 5 pies total.

adding ricotta to the pies

Arrange the hearts in pairs and smear with a heaping spoonful of ricotta. Feel free to add more if you really like the idea of ricotta and cherry (it's delish though, so you should definitely be open to liking it). Be sure to leave a wide enough berth around the edge to seal the pies.

adding cherry-filling to the pies

Add the cherry pie filling. I found that creating a mountain of ricotta with a valley in the middle for the cherries (a la mashed potatoes and gravy volcano) worked best.

putting heart pies together

Dip your finger in water (or butter) and run around the outside edge, then add the top piece and seal with a fork. It's okay if a little juice comes out, you can wipe it off before baking.

adding sprinkles

Rub a little water (or butter) on top so the sprinkles will stick. 

baking the heart hand pies

I baked the pies on 380º F for about 18 minutes. But that's just my oven and yours might be totally different. The best way is to keep an eye on them, and when the crust is cooked and turning golden brown around the outsides, take those babies out! When they're done, remove from the tray and allow to cool.

finished heart-shaped pies

And that's all there is to it! I managed to whip out about 15 hand pies within an hour. This tutorial also applies to pretty much any other simple cookie-cutter shape, and alternative fillings, and could be used for so much more than this holiday. They would make a nice birthday treat, mother's day delicacy, or accompaniment to finger sandwiches at a tea party. I highly recommend them. I gave some to Gu (so I suppose she could speak as to their quality without bias), and will take some to my man and my coworkers tomorrow! I hope you all have a very sweet Valentine's day, regardless of your plans, and definitely let me know how your pies turn out!

You make loving fun,
Cait

Sunday, February 9, 2014

Eggplant Pizzas (Pinterest Win!) | Fat and Happy

Greetings Lush Scouts! I don't know if you've heard, but I'm quite a pinner, and I actually find the majority of new recipes in my life on Pinterest. I have yet to have what they call a 'Pinterest Fail'. Maybe I'm just not motivated enough to try things that look difficult.  But the recipe below came directly from this pin (which lead me here)and into my kitchen. It's simple, delish, and not-too-bad-for-you: basically English muffin pizzas for grown-ups!

The ingredients list is crazy simple:
An Eggplant (not a shrimpy one, not a giant, just average)
Tomato Sauce (lucky for you, I posted a simple recipe last week!)
Olive Oil (it's a given right?)
Italian Seasoning (or whatever you have available)
Pizza Toppings (the hardest part, I know, but I went with fresh mozz, olives, and salami)

sliced eggplant

First, you want to slice the eggplant. The recipe I was following said to go with 3/4 inch slices. I, however, didn't have a ruler, so I just followed my heart. Here comes the weird thing with eggplant: you have to draw some of the water out before cooking with it. So you then salt both sides of the eggplant and put them on a paper towel. Leave them for 30 minutes to an hour, and then wipe the excess moisture and salt off with the paper towel.

roasting eggplant

Put the slices on a cookie sheet, brush with olive oil, sprinkle with slices and throw in the oven to roast. I gave them about 30 minutes at 400ºF. I was really hungry at this point and couldn't do more than 30 minutes. 

eggplant with tomato sauce

After you remove your roasted eggplant from the oven, set your oven to broil. Then slather those babies in tomato sauce

eggplant pizzas before cooking

Add your favorite toppings. I chose to go simple since it is such a small amount of topping-space.

eggplant pizzas before cooking

Just mozz and olives for me (I thew salami on some, but it was weird tasting, so I ended up taking it off.) Let it broil for 8 or so minutes. Keep an eye on it because every broiler is different. When it's melty and the cheese is starting to get some of those beautiful golden brown bubbles, you'll know it's time to eat.

how to make eggplant pizzas

Chow down! I had a couple right out of the oven and MAN were they good. I also put some in a tupperware, layered up and reheated at work. STILL DELICIOUS. 

And there you have it, lovely Lushies, a handheld pizza reminiscent of the English muffin pizzas of your youth. I recommend experimenting with different toppings. I'm thinking I'll go with hawaiian for my next go-round. Or maybe I'll throw some fresh basil on. The possibilities are endless!

I take my lunch up on the roof,
Cait

Monday, February 3, 2014

Simple Tomato Sauce | Fat and Happy

Gutentag meine schöne Lush Scouts. I have a recipe for you today that is both simple and extremely versatile: Tomato Sauce (street name: Marinara). It can be paired with noodles, slathered on pizza, mixed with quinoa, used as a dipping sauce (why helloooo mozz sticks) and so so much more. It has very few ingredients and takes very little work (no peeling involved, Scout's honor), making it a perfect Lush Scout recipe. This also means that you know exactly what is in your sauce and there are no crazy dyes, chemicals you can't pronounce, or preservatives; I assume this means healthy! Besides, this bag of tomatoes cost only 1 dollar more than a can of sauce, so it doesn't get any better! 

You can throw it in the freezer or eat it up right away. If you know things about canning you could do that too, but I have a healthy fear of Botulism, so I won't attempt that without the proper know-how. 


Ingredients for Tomato Sauce

To get crackin' on this delicious sauce, you'll need the following:
Tomatoes (whatever kind you like, and however much you think you'll use)
Garlic (I prefer fresh, but powder would work too)
Italian Seasoning (or a mix of your fave spices Italiano, or some fresh oregano and basil)
Salt
Pepper
Paprika (optional, but I put it in everything)
Carrots (the secret ingredient!)
Olive Oil (I forgot this in the above photo. My bad)

Peeling Garlic for Sauce

Start by peeling your garlic. I probably used about ten cloves (half a head) but this can be adjusted to taste. There's no need to mince the garlic, go ahead and roast them whole.

sliced and cored tomatoes

Next you will need to half and core your tomatoes. I just slice in half and cut a 'v' shape in the middle to remove the core.

tomatoes ready for roasting

Put the tomatoes inside-up on a pan, strategically place the garlic cloves, and drizzle with olive oil. Sprinkle liberally with pepper, paprika, and Italian seasoning. Also add a dash of salt to taste.

tomatoes ready for roasting

Then, into the oven at 400ºF for one hour. Your tomatoes will look all squishy and may even start to blister, but never fear, that's totally normal.

secret ingredient: carrots

While the tomatoes are roasting away, cut up those carrots and sauté in Olive oil. 

sauteed carrots for tomato sauce

The carrots add some extra nutrients to the sauce, as well as some needed sugar. Additionally, they help it keep its bright orange/red colour.

ingredients ready to blend

After your hour is up,  scrape the tomatoes, juice, garlic, and carrots into a pot.

blending tomatoes with a hand blender

Here is the messy part: blending the ingredients. I used a hand blender, which as you can tell from the spatter in the above photo, may have gotten a little out of hand. You could just as easily use a food processor or regular blender though.

simple tomato sauce

And then, VOILA!, you have sauce. If it isn't thick enough for your tastes, just put that pot on a burner and simmer it down. This is also the fun part where you get to taste and season. Add as much spices as you feel like. Follow your heart!

easy tomato sauce recipe

I then put mine in, no joke, an old spaghetti sauce jar. I used half of the sauce on dinner, and put the rest into the freezer. When I decide I need it, I'll just put it in the fridge before leaving for work in the morning and let it thaw right out.

That's all there is to it. You can make a lot or just one jar, like yours truly. Add more carrots if you prefer sweet sauce, or maybe experiment with different types of tomatoes. In the summer I'll definitely be playing around with some fresh basil and I'm also thinking of giving some lemon verbena a go. Let me know if you find any incredible combos!

then ride it with my surfboard,
Cait

Monday, April 15, 2013

Easy Peasy Cream of Asparagus Soup | Fat and Happy

My lovely Lushies, below you will find pretty much the easiest soup known to man that didn't come straight out of a can. You basically start with some asparagus with the woody ends chopped off (I think this was around 12-15 stalks but it doesn't really matter that much), some chopped up green onions, and whatever spices you like. I went with salt and pepper and paprika and red chile flakes, but that's only because I like the traditional taste of salt and pepper, I am obsessed with Paprika (because I wish I was from eastern Europe), and I want everything I eat to burn my esophagus.


You put all of those things into a crock-pot and add some chicken broth. Vegetable broth would be equally acceptable. I went with 4 cups but you can vary the amount depending on your tastes.


Set the crock pot on low before you go to work and let it steep for 8 or so hours.


When you get home it will be mushy and smell a lot like mushy asparagus and chicken broth. You then take one of these fancy fellers (or a regular blender if an immersion blender is not at your disposal) and blend that hot and mushy mix together carefully while adding some variety of cream. I used heavy whipping and not too much (only a third to a half of a container). But again, you can do it to taste, or use rice or almond milk if you're looking for a vegan alternative.


What you're going to end up with is a nasty coloured mix of magic deliciousness.


Seriously though, looks like butt, tastes like heaven. It's creamy and full of flavor and has practically no ingredients. This recipe is also good for those on a budget because asparagus is dirt cheap in the spring so you can save your money for more important things.


I enjoyed mine with fresh french bread. Later I accompanied it as my work lunch with some caraway rye triscuts, like a classy classy lady.

Debating Swedish Fish,
Cait